Certifications
Setting Up Certifications
If you are a business that requires local or state licensing, NewLIST allows you to show off your certifications to your prospective clients with actual images or PDF documents.
Managing Certification Images / PDF Documents
1. Upload the image or PDF of each type of certification.
Collect the necessary image or PDF document of your certification, whether a license, bond, insurance and/or verification of employee background checks. Note that these documents should be public facing versions of your documents and not something that contains private or personal information.
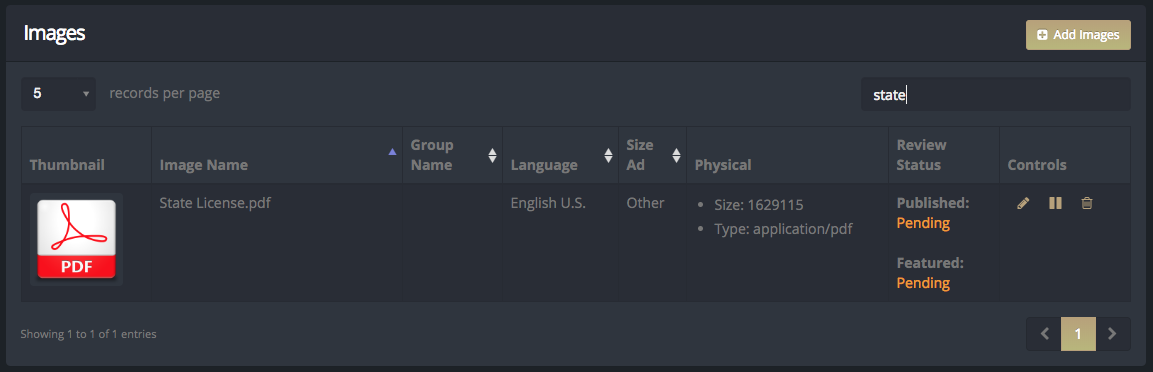
Now navigate to the Account > Manage Images area of NewLIST. Open the uploader area of the page by clicking on the Add Images button. Drag your image or PDF certification documents into the uploader area and your images and/or documents will be automagically uploaded and available for your account to now use.
NOTE: Use only one image or PDF document for each type of certification: one image/document for your "license", one for your "bond", one for your "insurance" and one for your "background check" verification document. If you have one background check document for each employee, NewLIST requires that your place all of these into one PDF document. NewLIST also accepts a simple verification letter from your background check provider as proof of your company's background check status.
2. Designate What Certification the Image Represents
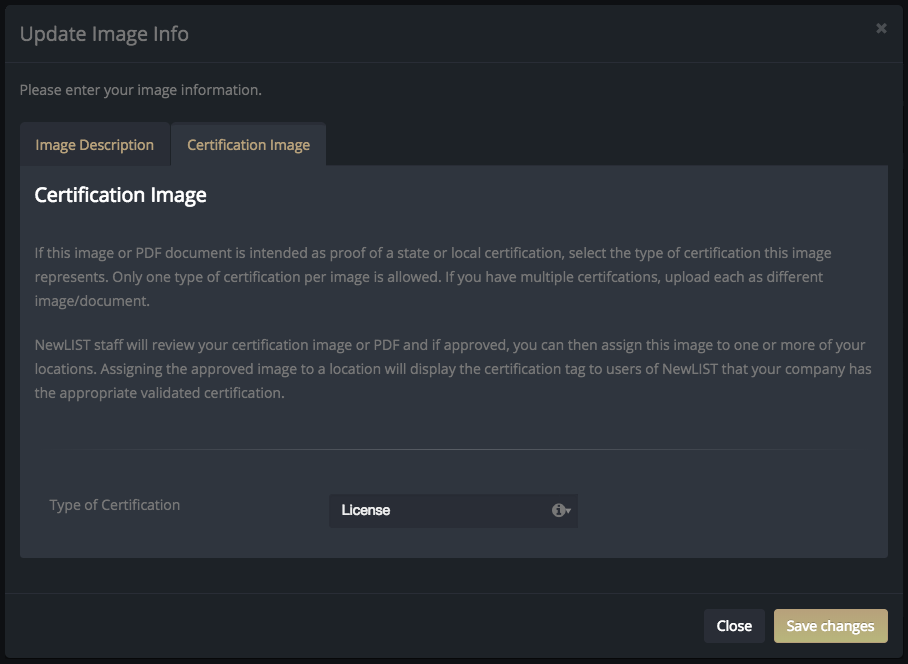
Once your certification images/documents are uploaded, click the icon for the certification image in the images table to bring up the Update Image Information window. Click the Certification Image tab and then select the type of certification this image represents: license, bond, insurance, or background check verification. Click the Save changes button and then click Close to close the window.
3. Approval of Certification Image / Documents
Once your image / documents are saved, you will see that they are in a Pending status. NewLIST staff will now verify your certification documents and either approve or deny the image or document as valid. DISCLAIMER: NewLIST staff do not specifically "authenticate" certification documents. That is not our responsibility. We simply verify that the image or document "appears" to be from an official source and then we provide that image for our users to view, inspect, and make their own determinations on their own as to whether an advertiser's certifications are "legitimate", "current", and/or necessary for their needs.
4. Assign Approved Images to your Location(s)
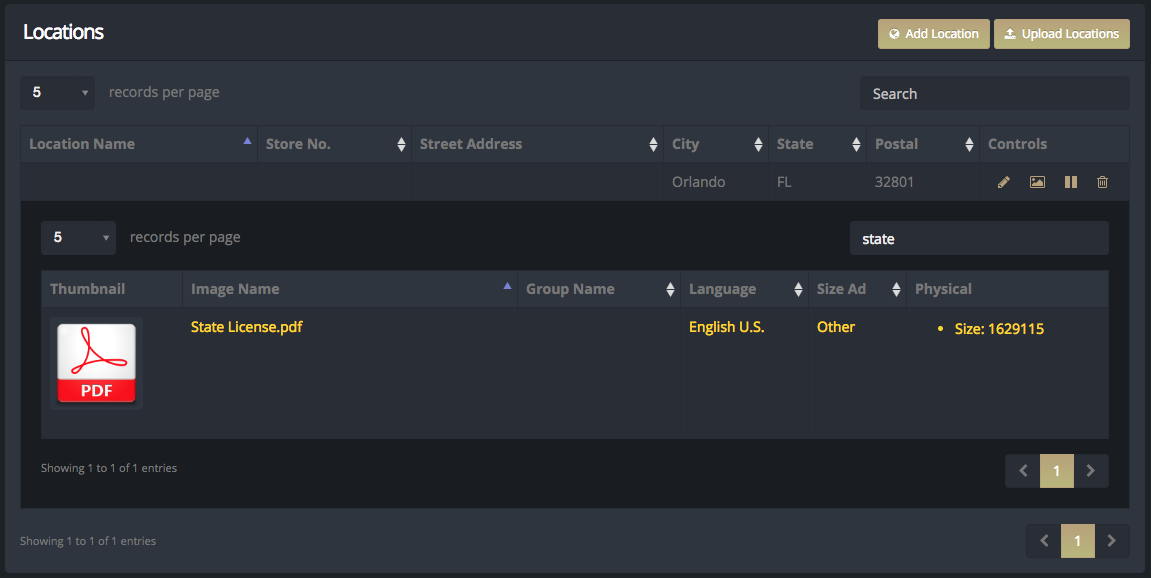
Once your certification images are approved, the final step is to assign these images to your location(s). Navigate to the Account > Manage Locations area and then click on the icon to open the images assignment window. Simply find and select the approved certification image / document and then click on the row to assign this image to the location. The image row turns a highlighted gold color to let you know the image has been assigned to this location. Clicking on the image row again will remove the certification image from this location and the highlighted gold indicator color returns to normal. Repeat this assignment process for each of your certification images.
This certification will now appear in your ad's detail information on NewLIST!